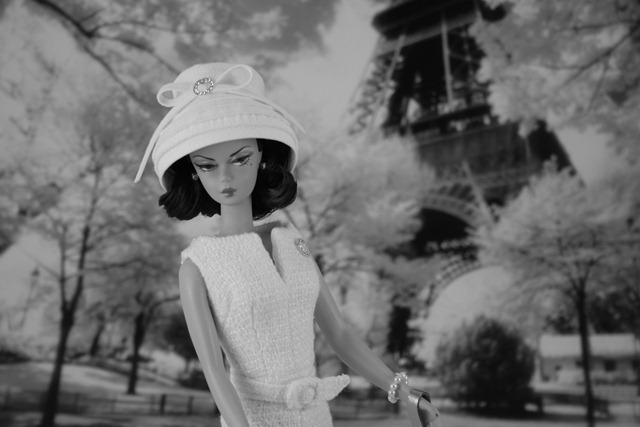
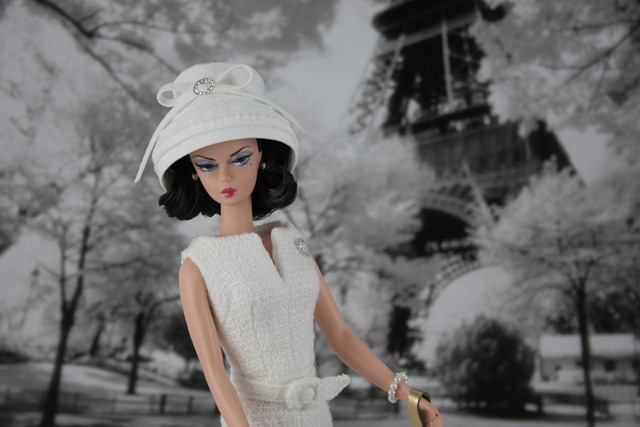
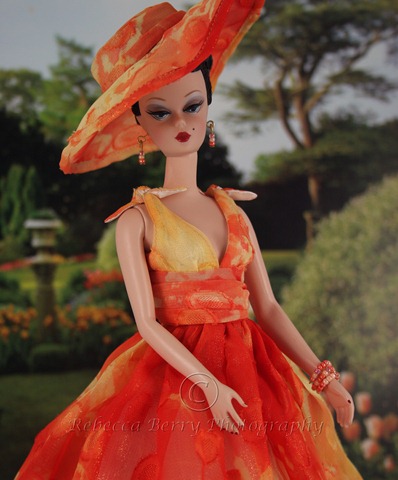
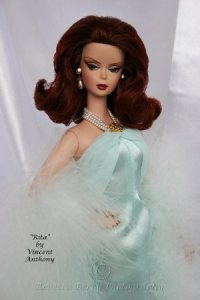
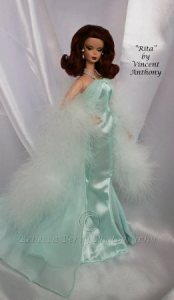
FR Squared Dark Swan Elise Jolie wears Vera Wang in the fashion doll studio
When the first Fashion Royalty Elise Jolie came out at the FR convention a couple of years ago, I was not a fan. She was extremely severe looking and that is not the aesthetic I go for. When the designers at Integrity gave her a softer makeup palette and glorious red hair….I had to have her. She is becoming one of my favorite models. I kept thinking, wouldn’t she look fabulous in white or cream with all that red hair so, I decided to steal the Vera Wang bridal gown from one of the Barbie girls and loved the look. The dress was sewn on to its previous owner so I had to sew it on ,temporarily, to Miss Elise. I could have taken the time to put hooks and eyes on it but was impatient to photograph so that job will wait until later. The props used in these shots are simple wall shelves from Target.


Click on photos for larger view
And here are the photos that resulted
 |
FRSquared Dark Swan Elise Jolie in Vera Wang |
|||
 |
 |
 |
 |
 |
 |
||||
–Rebecca
Ekaterina arrives in the Fashion Doll Studio
Robert Best has designed a new line of dolls for the BFMC inspired by Russia and Russian fashions. The first one into the doll studio is Ekaterina. She is exclusive to the Barbie Fan Club . I am always a sucker for any doll with red hair. When I saw the promo pictures, I knew this lady would be destined for my doll room and The Fashion Doll Studio. Upon arrival, I was not impressed. In her coffin of a box, she appeared very pale and the hair was not the riot of curls the promo picture would indicate. That being said, I decided to debox and am very glad I did. This is definitely a lady that needs to be DEBOXED to reach her full potential. I did have to finesse the hair a bit to get the fuller look…more curls not one big curl on either side of the head. The hat….not the best but I can deal. I foresee a hatless model in the future but for now it will stay on her beautiful head. I am a little afraid of the hat hair situation under there. The bracelet was a surprise because I was expecting the same bracelet as D2D and Preferably Pink but it is slightly different – yeah! The brooch on the hat is beautiful. The outfit is similar to JNSQ but not too close. The boots people…are…. TO DIE FOR.
I had some fun with my macro lens in the photo shoot so I was able to get some great up close shots. Hope you enjoy.


Testing new configuration
Just checking the new blog to see how things will work and look…..
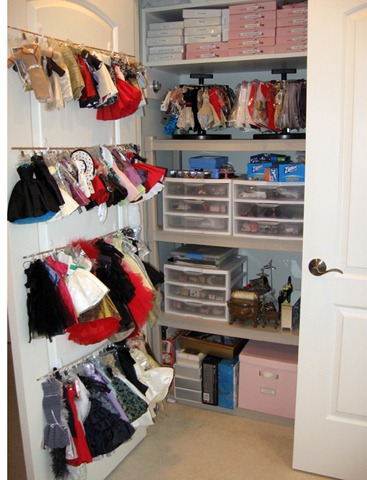
Inside the Doll Closet
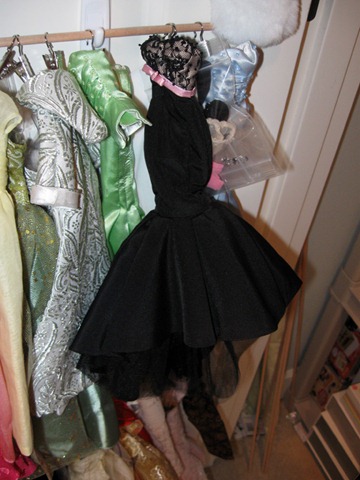
I have been thinking for the last year about different ways to store my doll fashions. I had all the fashions stored with their accessories in plastic zip lock bags with accessories in smaller bags all stored in decorative boxes in the closet of my doll room. There were a few problems with this system. First, I knew that over time the plastic would not be the best idea as it can effect fabric in a negative way. Secondly there was the space issue. The volume of fashions that I have collected meant that I needed five boxes to store them and that took up what I considered a huge amount of space in the closet. I would have rather used that space for other things…..like 1:6 scale furniture and props for my photo shoots. Thirdly, there was the wrinkle factor. I really wanted to hang some of my more unique and delicate outfits ( like the Bogue’s Vogues) so that they would not get crushed or wrinkled while being stored. Lastly, because these items were all stored away in a boxes, I never really knew what I had until I decided to “unpack” a box. I really wanted a system where I could just go in and see what I had and choose from there….like a doll closet.
I was meandering through Flickr a few weeks back and happened upon a photo from one of my favorite photographers. It showed a revolving rack with doll clothing on it. I immediately knew this was what I had been looking for. The system is called “clip it up by Renee” and it was designed to help organize scrapbooking supplies. If did some research and found that the mini rounds were just the right size to store 1:6 doll scale clothing. It would not be able to store the huge ball gowns I had collected over the years but I would figure out something for that. The main downside of the clip it up racks would be the cost. They are pricey. I spent around $35.00 each( that was on sale) for the rounds and I purchased two. The rounds come with 40 clips but I went ahead and ordered more clips….glad I did.

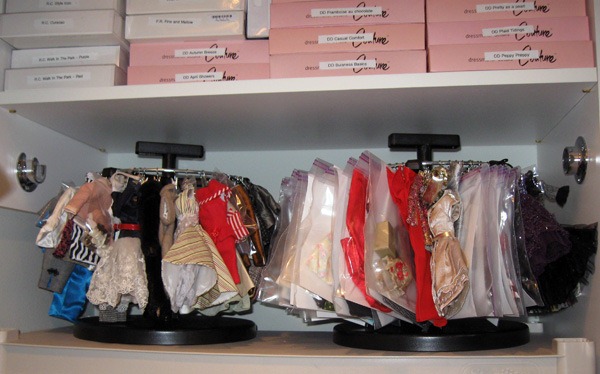
The rounds were very easy to put together and I filled them up very, very quickly. I love the ability to move the rack around – it rotates like a clothing rack at a store – so I could see everything on the round. This was exactly what I had envisioned. The only problem was that I was going to need a couple more rounds and that was more than I wanted to spend on this project. Also, the rounds take up about as much space as the boxes did and I was after more space in the closet for other things. So….I started thinking…..I really liked the clip idea as it made it easy to use. I started thinking about wasted space in the closet. I have a closet in my doll room that has two doors that open out – not sliding doors. I thought….what if I use the space on the back of the doors? It isn’t used for anything. I started looking at racks that hang on the back of your door like for extra towels in the bathroom. The problem there was that the rack bars were too large to use the clip it up clips on. Then I thought “ What if I make my own rack”. I found wooden dowels at Ben Franklin that were the right diameter to use with the hooks, cut them to size to fit the back of the door. Then I attached adhesive hooks to support the dowels and voila! instant rack. I tried to space the dowels so there would be the optimum amount of hanging space on the backs of the doors. I think it worked beautifully for a fraction of the cost of the clip it up rounds. I still like the rounds but prefer the price of the back of the door system. The main expense for the back of the door system were the clips. They cost $8.00 – $12.00 per 40 clip bag depending on where you buy them. I liked the idea so much that I decided to hang the jewelry in small bags too so I could see what I had.
Here is the almost finished project. Still working on it a bit.
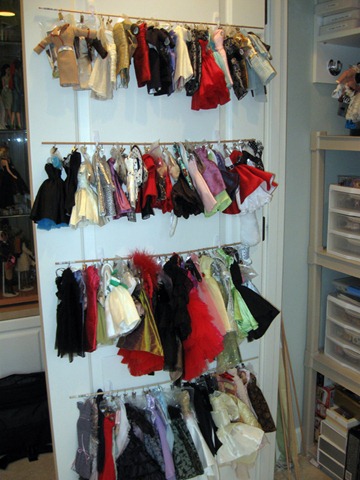
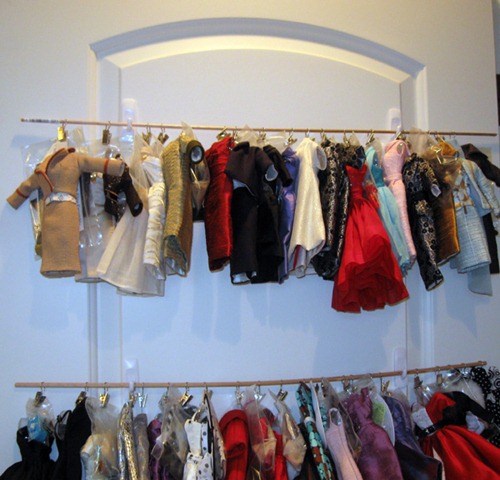
The hanging system on the back of the door allows me to hang the big ball gowns without wrinkling the skirts.
The clips also give me the option of keeping outfits and accessories together. I just put accessories for an outfit in a little bag and clip it up with the dress.

All in all, I am very happy with the end product. A big “Thank You” to Princess Di Orama on Flickr for posting the photo that started the ideas churning and helped me to create my doll closet.
–Rebecca
Behind the scenes in Rebecca’s studio
I have had a number of board members write and ask me to share how I take my photos. With their encouragement, I thought I would share some information on my thread. I know I always love to see the “behind the scenes” shots on other peoples dioramas and photos so I hope you will find it useful.
I take most of my photos in a photo tent:

It is basically a nylon cube ( that can be folded up and stored away but I leave mine up as I use it all the time). I use a variety of backdrops – most that are made specifically for the 30 inch photo cube that I use.
Lighting is a key feature in what I do. I use three separate lights that difuse through the nylon photo tent.

The fact that there is defused light really cuts down on shadows. Some people use one big soft box light from the front ( I think this is how Mattel does theirs) but I prefer the flexibility of different light points.
The studio does take up space….

But, for me….I use it almost every day. It is set up in the corner of our bonus/play room so I enjoy being up there when my daughter is practicing her violin or when my son is playing a video game. I have the tent set on two shelves so I can store props that I use for photos.


The other big component of my photography is the processing afterwords or post production. For me, that is photoshop Elements. I try to get most of the componets I want when I actually take the picture but I normally tweek every single photo with photoshop before I post it..even if it is just to resize it to the appropriate dimensions for the various doll boards. I like to whiten backgrounds with photoshop and saturate colors if necessary. Here is a raw photo:

And here is the finished product after photoshop.

Here is an example of what a set up looks like when everything is lit up

I hope you found this information helpful. Feel free to ask questions.
–Rebecca
Using Calendars as backdrops
I am always on the hunt for things that will work as easy and interesting backdrops for my photos. Lately, in Costco, I have seen some large 14×10 calendars that have been fun to use and I thought I would share some of the results here.
My first attempts at using the backdrops were using a black and white calendar with pictures of Paris ( one of my all time favorite places on the planet to visit). Here are a few photos from those efforts.


Originally the photos were like this with the dolls in color and the background in black and white.
This is very easy to change in photoshop. Just select Black and White in your color adjusting window and presto chango. I may have had to tweek the contrast and brightness on these as well but that is also easily done in photo shop. These ladies are only shown from the waist up as the calendar page backdrop stopped right at waist level. I think they turned out pretty cool so I attempted to try it with color.

I think the most important thing to remember with these photo backgrounds is scale and lighting. I hung the calendar pages with tape on a piece of cardboard at the back of my photo tent. I look through the lens of my camera ( on a tripod) then eyeball whether or not the photo is high enough and the doll placed an appropriate distance from the photo to give it the right scale. This is very low tech and fairly easy to do. Just play with the lighting until it looks right to you and make sure you crop the photo to remove any evidence that it is really a picture in the background. I realize that all this is so much easier to do in photoshop. I am having a great deal of fun learning the fun things you can do with that program. It is, in my opinion, however, a very difficult program to learn and somewhat overwhelming. If anyone wants to add some splash to their backgrounds….this is one way to do it. Just wanted to share.
–Rebecca
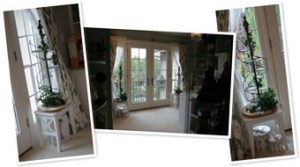
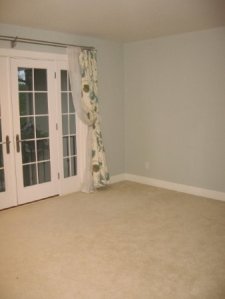
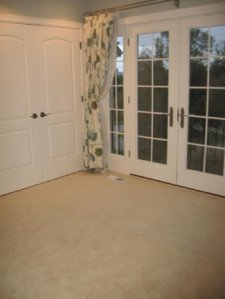
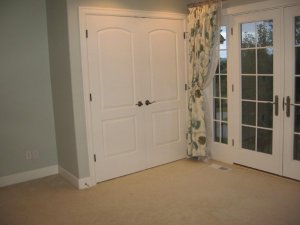
View from the dollroom
I was exchanging emails with another board member on BFC and fellow blogger the other day and she was wondering what the french doors in the doll room led to. I had really never thought about posting photos of the small world beyond the doll room door before but she encouraged me to post the photos on the BFC and I decided to put them here too. I realized that the space that exists outside the doors of the doll room are just as important to me as the room itself because they all work together to inspire me. The doll room has a view of the Olympic Mountains ( one of the best views in the whole house) and overlooks a garden and fountain.

These photos were taken in the spring of 09. I hope everyone had a wonderful holiday and I wish you all a Happy New Year.
–Rebecca
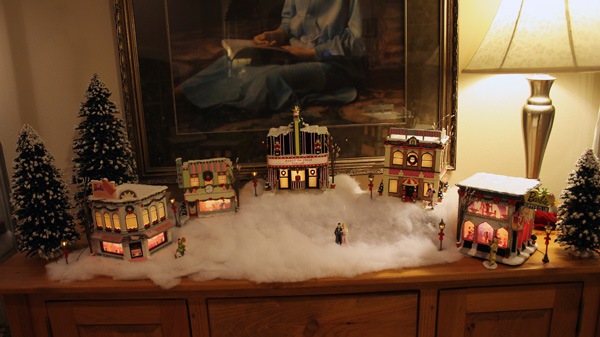
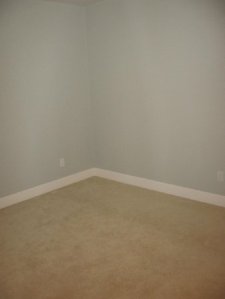
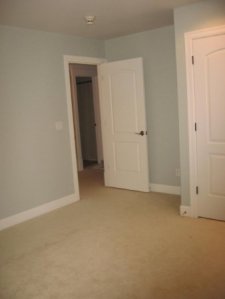
The holidays have started to hit the doll room
Well, the carpets had to be cleaned today so I spent a good chunk of last night cleaning out the doll room so the whole floor area was available for cleaning. When they were done, I decided to put the wallbed down and take some photos of what the room looks like with a bed in the room.

The holidays are always big in our home. Some holidays we are entertaining every weekend. This year, with my little ballerina in the PNB Nutcracker, things are a bit more scaled down. That does not stop the decorating mania that starts around November 1st though. Here are a few Barbie decorations on the landing just outside the doll room.

More entries should be coming up as my schedule is getting a little less hectic during the day now.
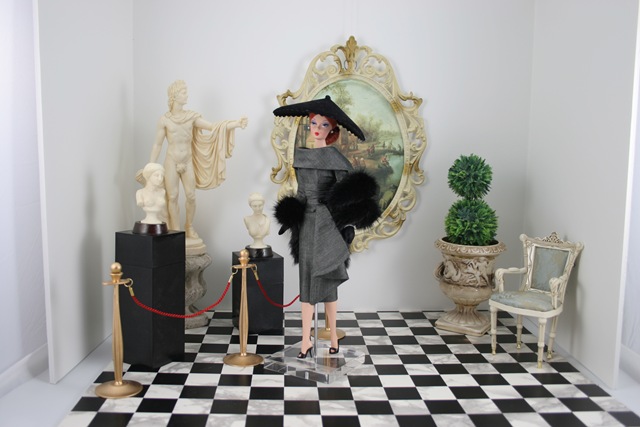
Dahlia visits the museum
I was able to fit a photo shoot in this weekend as I slalomed through costume fittings, rehearsals, ballet classes and social engagements for my daughter. I am just her chauffeur LOL! I have had this idea for a while of setting up a museum scene and I finally had the prefect Bogue’s Vogue that could be showcased in this setting. Here is a shot of the full set
The resulting photos turned out very good, I think. They all had the feel I was going for.

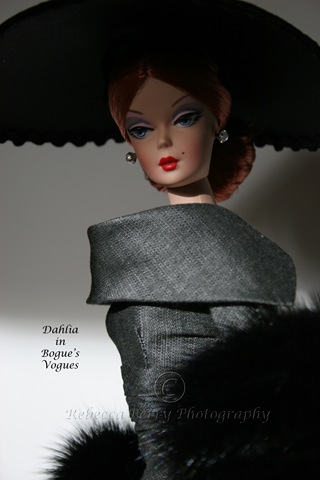
I was just about to put the camera away when the sun streamed into the area that I have my photo studio so I moved Dahlia to a smaller table just inside the pool of light and took a few shots. This was just freehand without a tripod….always risky…but I managed to get some pretty clear shots. Here is the one I think is the best of the bunch. Very film noir.
New Addition to Doll Room
I added a few sprigs of ivy and now they are ready to be filled with Silkstones. Pictures to follow soon.
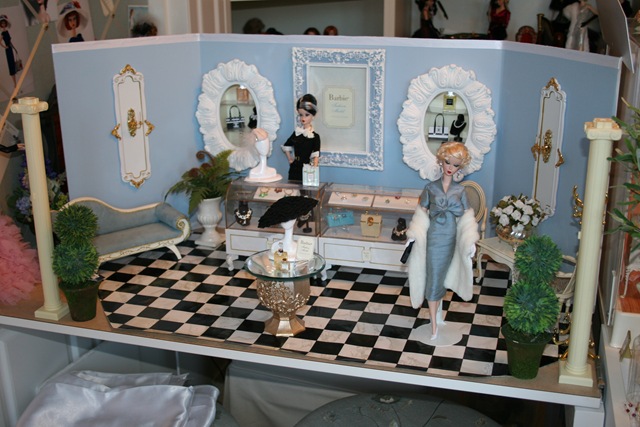
Shopgirl’s fancy shop gets a name and some press
Ahh Photo shoot Friday yet again. Many, many different projects going on this week. First and foremost, Shopgirl’s fancy shop received a name and it’s Grand Opening photo shoot. I had to set it up on the table in the doll room so it had better light for the shoot ( thank goodness for the good weather this week!!) I had to fit in bits and pieces of time for the photo shoot throughout the day so I could get the best light – afternoon works the best with the maximum amount coming in through the doll room windows. Here is the setup
The photos turned out pretty good and I spent a huge chunk of time photoshopping and tweaking. Then a brainstorm hit and I decided to do another slideshow set to music just showing the shop and introducing the shops new name. Now there is a whole other story…..how did I decide on the shops name. I decided I couldn’t just keep calling it Shopgirl’s fancy shop. It needed its own name. It needed something classy to fit with Shopgirl. It needed something French as it felt like a European style shop. I bounced ideas of my trusted in-house technical support. He suggested I try translating directly “fancy shop”. Translated to French it read ” Boutique de fantaisie “. I looked at my technical support and he looked at me…..something was not quite right. “What?” he says, “Sound too much like an exotic dance place??”. Yep, it did. So off to find a better name. After much discussion we finally settled on “Belles Choses”. Translated, it means beautiful things. Yeah!! Shopgirl finally has a name for her beautiful shop. I finished up the slideshow and then began the arduous task of converting it to WMV (chug,chug,chug goes the computer) and posted it to youtube for everyone’s viewing pleasure. I think it turned out really cute. The snappy music is from the soundtrack “Miss Pettigrew lives for a Day”. A number of people have asked for more information on the lighting fixtures in the shop. Here are some more up close and “behind the scenes” photos of the shop.

The white panels with the gold embellishments are just mirrors from some Disney princess sets that I painted white (Krylon white spray paint for plastic ) and added gold scrapbooking photo corners to. The light fixture is a doll house candle sconce that I made look bigger by adding a gold escutcheon ( fancy word for keyhole cover). The light fixture could work if you wanted to drill a hole through the back of the plastic mirror. I was too lazy so that light fixture does not work. The built in display shelves have working lights however. They are just the clip on book lights that you find everywhere. Notice how I like to reuse silkstone boxes to LOL! I always love the “behind the scenes” photos from other people’s doll blogs so I hope someone else will find these of use. I also wanted to show the absolute carnage in the doll room after one of these shoots.
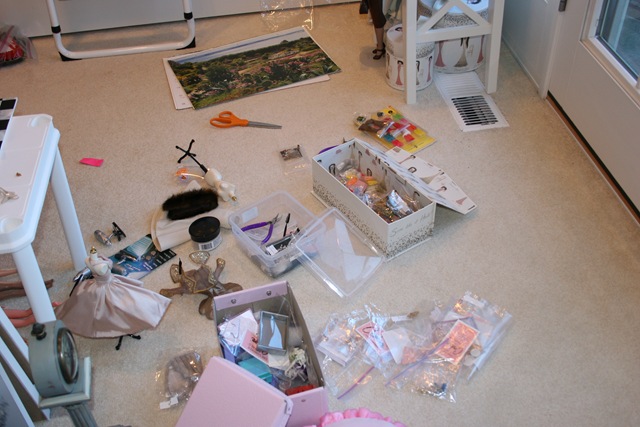
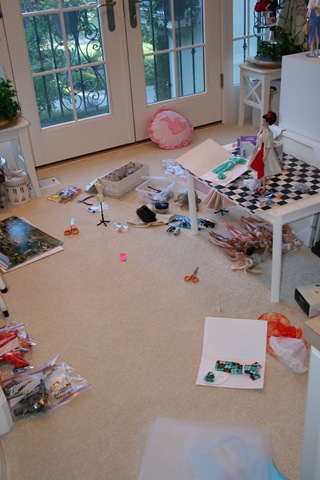
There is usually stuff everywhere because when the light is good, I’m just pulling stuff out and getting it set so I can get the shot. I worry about clean up much later. I was also able to do a phototent shoot that day and used a seldom used model in the silkie world…Chataine. I recently aquired some outfits from Fashion Boulevard. I LOVE them. Here are a few shots from that set

. Well that about does it for now.
One more Photo Effects site to share
I am having so much fun with the photo effects!! I have a photo shoot all set up for today and I hope I can focus and get it done. Here is one more really fun one – especially for all the Twilight fans out there….and you know who you are.

Photo effect site: http://jpgfun.com/effects/
Photo effects to start
I was just kind of playing around today with photo effects. There are a number of internet sites that are free and have some really cool effects you can add to your photos. Today I used a website called Photofunia and BigHugeLabs ( websites posted below). These sites are very easy to use. There are some tricks however. Make sure you have your photos sized correctly. If you have photoshop, this is really easy in that you just open a file and select Image, then resize. Photofunia for example has a 3200 pixel max so the largest side cannot exceed 3200 pixels. When you resize, make sure the largest side is not bigger than 3200 pixels. With Photofunia also remember that portrait, face or face and torso only make the best shots for this software. Here are some of the fun photos I ended up with.


Pretty cool huh? Just remember that you will most likely need to resize your photos to use this software. After you have created the image on these free websites, you will be asked if you want to send it to a friend or save it to disk or file. I usually save it to file then copy it onto my photo sharing service. Hope this helps give people ideas on some additional things they can be doing with their photos.
Photofunia – http://www.photofunia.com/
BigHugeLabs – http://bighugelabs.com/
And there are more…just search under “photo effects” and look for free sites.
Photoshoot Friday – Rita Hayworth came to visit

Photoshoot Friday – Shopping for Props
Loading the thread
Evening of the Rubik’s cube
 at the bottom of my BFC posts.
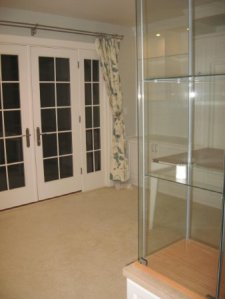
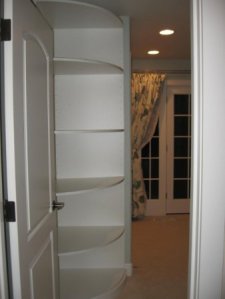
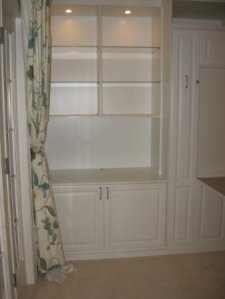
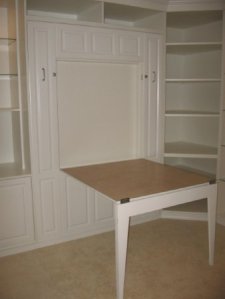
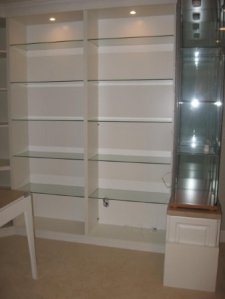
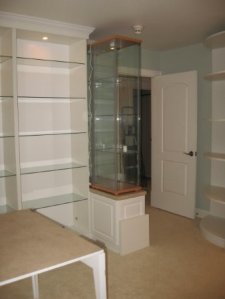
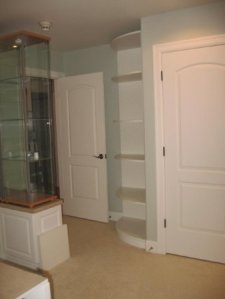
Birth of a Doll Room
- Shelving for displaying dolls
- Larger shelving for diorama displays
- storage for clothing, boxed dolls, accessories and diorama items
- a table or work surface
- ability to make the room multifunctional –wall bed?
- lighting in the display cabinets
- easy access to electrical outlets on diorama display shelves
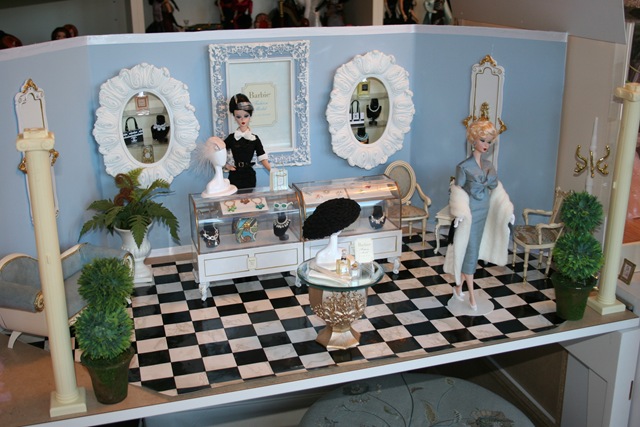
- large display area (2′ x 3′ and at least 18 inches tall) for Barbie Vintage Fashion Shop display
- Better overall lighting in the room – possible addition of chandelier or track lighting.
A very long list right. So I decided to call a professional for help. I worked with Pacific Wallbeds Northwest to design a system of shelving and wallbed that would meet the needs of the list above. They were able to accomodate each and every one and made the process so enjoyable along the way. They came in on budget and one time – a match made in heaven. Their team even put in extra items that I had not thought of. There is a large corner in the room when you come in the door and the designer with WBNW suggested a radius cabinet to maximize display space. I had a couple of IKEA display cases that I wanted to use in the room and the designer suggested we set them up on cabinets so you could see the displays better and that offered storage underneath – brilliant!. Here is how it turned out.