
Inside the Doll Closet
I have been thinking for the last year about different ways to store my doll fashions. I had all the fashions stored with their accessories in plastic zip lock bags with accessories in smaller bags all stored in decorative boxes in the closet of my doll room. There were a few problems with this system. First, I knew that over time the plastic would not be the best idea as it can effect fabric in a negative way. Secondly there was the space issue. The volume of fashions that I have collected meant that I needed five boxes to store them and that took up what I considered a huge amount of space in the closet. I would have rather used that space for other things…..like 1:6 scale furniture and props for my photo shoots. Thirdly, there was the wrinkle factor. I really wanted to hang some of my more unique and delicate outfits ( like the Bogue’s Vogues) so that they would not get crushed or wrinkled while being stored. Lastly, because these items were all stored away in a boxes, I never really knew what I had until I decided to “unpack” a box. I really wanted a system where I could just go in and see what I had and choose from there….like a doll closet.
I was meandering through Flickr a few weeks back and happened upon a photo from one of my favorite photographers. It showed a revolving rack with doll clothing on it. I immediately knew this was what I had been looking for. The system is called “clip it up by Renee” and it was designed to help organize scrapbooking supplies. If did some research and found that the mini rounds were just the right size to store 1:6 doll scale clothing. It would not be able to store the huge ball gowns I had collected over the years but I would figure out something for that. The main downside of the clip it up racks would be the cost. They are pricey. I spent around $35.00 each( that was on sale) for the rounds and I purchased two. The rounds come with 40 clips but I went ahead and ordered more clips….glad I did.

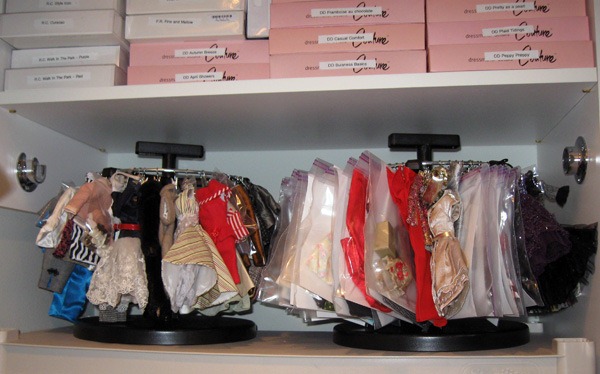
The rounds were very easy to put together and I filled them up very, very quickly. I love the ability to move the rack around – it rotates like a clothing rack at a store – so I could see everything on the round. This was exactly what I had envisioned. The only problem was that I was going to need a couple more rounds and that was more than I wanted to spend on this project. Also, the rounds take up about as much space as the boxes did and I was after more space in the closet for other things. So….I started thinking…..I really liked the clip idea as it made it easy to use. I started thinking about wasted space in the closet. I have a closet in my doll room that has two doors that open out – not sliding doors. I thought….what if I use the space on the back of the doors? It isn’t used for anything. I started looking at racks that hang on the back of your door like for extra towels in the bathroom. The problem there was that the rack bars were too large to use the clip it up clips on. Then I thought “ What if I make my own rack”. I found wooden dowels at Ben Franklin that were the right diameter to use with the hooks, cut them to size to fit the back of the door. Then I attached adhesive hooks to support the dowels and voila! instant rack. I tried to space the dowels so there would be the optimum amount of hanging space on the backs of the doors. I think it worked beautifully for a fraction of the cost of the clip it up rounds. I still like the rounds but prefer the price of the back of the door system. The main expense for the back of the door system were the clips. They cost $8.00 – $12.00 per 40 clip bag depending on where you buy them. I liked the idea so much that I decided to hang the jewelry in small bags too so I could see what I had.
Here is the almost finished project. Still working on it a bit.
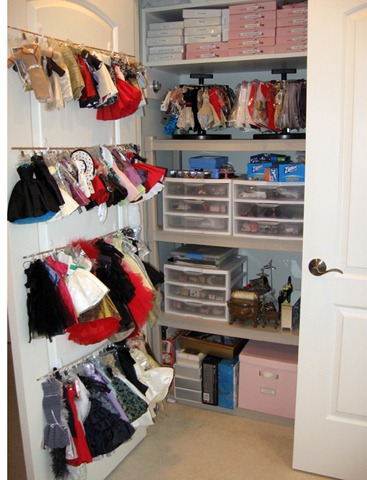
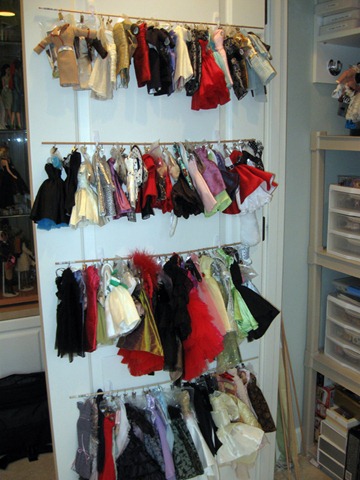
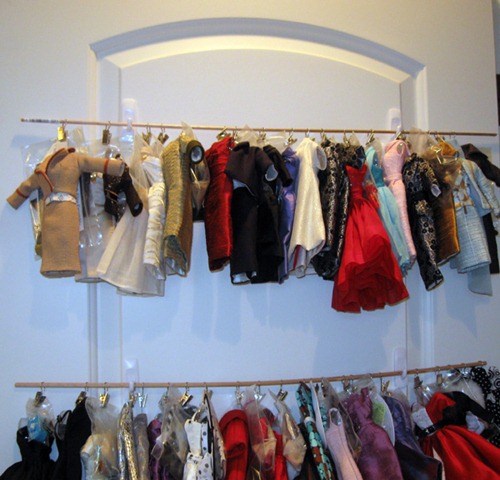
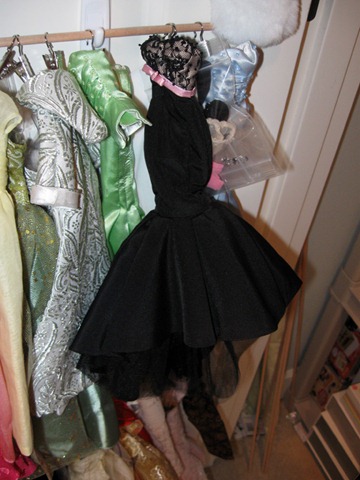
The hanging system on the back of the door allows me to hang the big ball gowns without wrinkling the skirts.
The clips also give me the option of keeping outfits and accessories together. I just put accessories for an outfit in a little bag and clip it up with the dress.

All in all, I am very happy with the end product. A big “Thank You” to Princess Di Orama on Flickr for posting the photo that started the ideas churning and helped me to create my doll closet.
–Rebecca


Wow!! I just started collecting. This is inspirational. So many clothes!!! 🙂
March 20, 2011 at 8:32 am
Hi Quinnie and welcome to the wonderful world of doll collecting! I am glad you enjoyed the look inside my doll closet. My girls are big clothes horses as you can see LOL! I look forward to sharing more photos of my collection and doll room in this blog and hope you continue to enjoy it.
March 21, 2011 at 1:17 pm