Barbie for big girls.

Latest

New Addition to Doll Room

Okay… so most people go to the garden shop to search for..well..garden stuff right??!! I have a favorite place I like to go to for inspiration for ideas in home interior design, garden design and decorating. It is in Woodinville, WA and is called Molbak’s. It is primarily a plant nursery but for those of us who frequent it, we know it is really a wonderful place to spend the afternoon browsing, eating lunch with a friend and absorbing creative ideas imagined by the talented Molbak’s staff. Recently, I happened upon a perfect doll room addition as I browsed the eye candy at this magical place. I know most people might look at these lovely plant stands and say ” Yes, that would look good on my patio with some nice petunia’s”. I took one look at them and said ” Oh yeah!! Barbie display stand!” Here are the procured stands on top of two little tables I found at Ikea. I also added two large wooden lazy susans so the stands could be rotated to aid in viewing all the display pieces.

I added a few sprigs of ivy and now they are ready to be filled with Silkstones. Pictures to follow soon.

Shopgirl’s fancy shop gets a name and some press

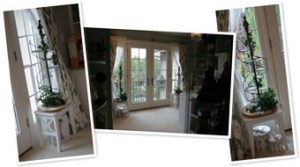
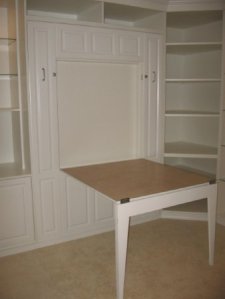
Ahh Photo shoot Friday yet again. Many, many different projects going on this week. First and foremost, Shopgirl’s fancy shop received a name and it’s Grand Opening photo shoot. I had to set it up on the table in the doll room so it had better light for the shoot ( thank goodness for the good weather this week!!) I had to fit in bits and pieces of time for the photo shoot throughout the day so I could get the best light – afternoon works the best with the maximum amount coming in through the doll room windows. Here is the setup

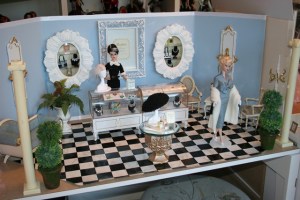
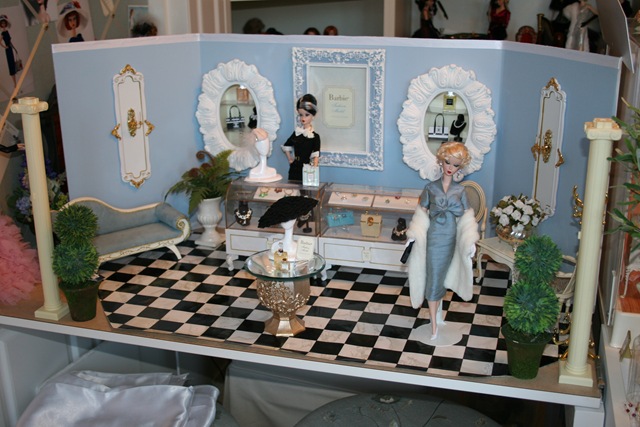
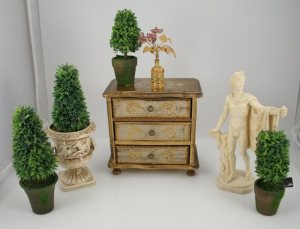
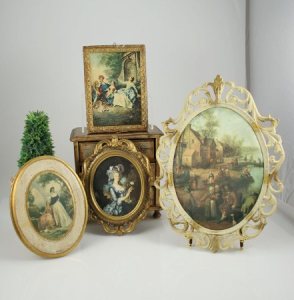
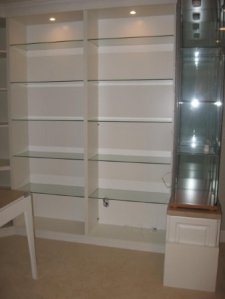
The photos turned out pretty good and I spent a huge chunk of time photoshopping and tweaking. Then a brainstorm hit and I decided to do another slideshow set to music just showing the shop and introducing the shops new name. Now there is a whole other story…..how did I decide on the shops name. I decided I couldn’t just keep calling it Shopgirl’s fancy shop. It needed its own name. It needed something classy to fit with Shopgirl. It needed something French as it felt like a European style shop. I bounced ideas of my trusted in-house technical support. He suggested I try translating directly “fancy shop”. Translated to French it read ” Boutique de fantaisie “. I looked at my technical support and he looked at me…..something was not quite right. “What?” he says, “Sound too much like an exotic dance place??”. Yep, it did. So off to find a better name. After much discussion we finally settled on “Belles Choses”. Translated, it means beautiful things. Yeah!! Shopgirl finally has a name for her beautiful shop. I finished up the slideshow and then began the arduous task of converting it to WMV (chug,chug,chug goes the computer) and posted it to youtube for everyone’s viewing pleasure. I think it turned out really cute. The snappy music is from the soundtrack “Miss Pettigrew lives for a Day”. A number of people have asked for more information on the lighting fixtures in the shop. Here are some more up close and “behind the scenes” photos of the shop.

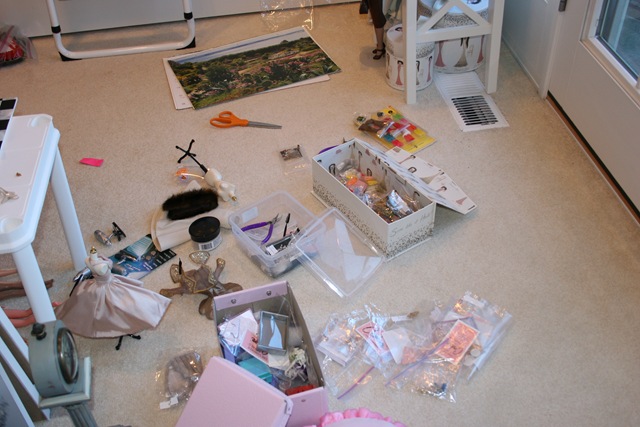
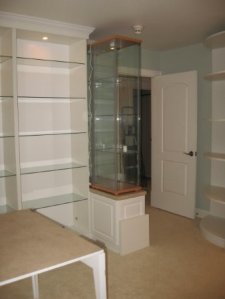
The white panels with the gold embellishments are just mirrors from some Disney princess sets that I painted white (Krylon white spray paint for plastic ) and added gold scrapbooking photo corners to. The light fixture is a doll house candle sconce that I made look bigger by adding a gold escutcheon ( fancy word for keyhole cover). The light fixture could work if you wanted to drill a hole through the back of the plastic mirror. I was too lazy so that light fixture does not work. The built in display shelves have working lights however. They are just the clip on book lights that you find everywhere. Notice how I like to reuse silkstone boxes to LOL! I always love the “behind the scenes” photos from other people’s doll blogs so I hope someone else will find these of use. I also wanted to show the absolute carnage in the doll room after one of these shoots.

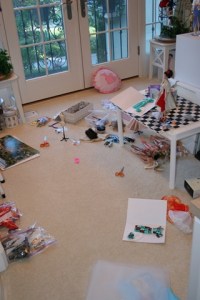
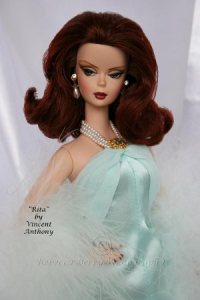
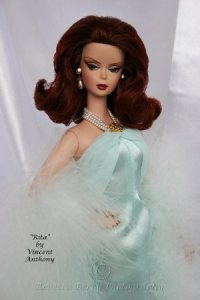
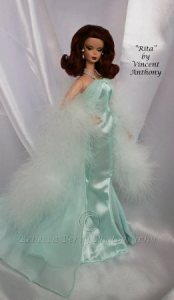
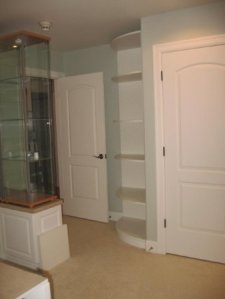
There is usually stuff everywhere because when the light is good, I’m just pulling stuff out and getting it set so I can get the shot. I worry about clean up much later. I was also able to do a phototent shoot that day and used a seldom used model in the silkie world…Chataine. I recently aquired some outfits from Fashion Boulevard. I LOVE them. Here are a few shots from that set

. Well that about does it for now.

One more Photo Effects site to share

I am having so much fun with the photo effects!!  I have a photo shoot all set up for today and I hope I can focus and get it done.  Here is one more really fun one – especially for all the Twilight fans out there….and you know who you are.


Photo effect site:  http://jpgfun.com/effects/

Photo effects to start

I was just kind of playing around today with photo effects.  There are a number of internet sites that are free and have some really cool effects you can add to your photos.  Today I used a website called Photofunia and BigHugeLabs ( websites posted below).  These sites are very easy to use.  There are some tricks however.  Make sure you have your photos sized correctly.  If you have photoshop, this is really easy in that you just open a file and select Image, then resize.  Photofunia for example has a 3200 pixel max so the largest side cannot exceed 3200 pixels.  When you resize, make sure the largest side is not bigger than 3200 pixels.  With Photofunia also remember that portrait, face or face and torso only make the best shots for this software.  Here are some of the fun photos I ended up with.

Pretty cool huh?  Just remember that you will most likely need to resize your photos to use this software.  After you have created the image on these free websites, you will be asked if you want to send it to a friend or save it to disk or file.  I usually save it to file then copy it onto my photo sharing service.  Hope this helps give people ideas on some additional things they can be doing with their photos.

Photofunia – http://www.photofunia.com/

BigHugeLabs – http://bighugelabs.com/

And there are more…just search under “photo effects” and look for free sites.

Photoshoot Friday – Rita Hayworth came to visit

I just received a OOAK repaint by Vincent Anthony and I am sooooo excited!!  I have admired this artist’s work for quite some time and I think the work is absolutely exquisite!  I tried to photograph this lovely lady in the photo studio but just could not get the soft dreamy Hollywood glam shots I was envisioning so I went to bed dejected last night.  Sometimes you just have to leave something and revisit it later with a fresher viewpoint.  Today, was very gloomy in the Pacific Northwest…I know…how unusual!  Anyway, just after lunch the sun appears out of nowhere.  An idea blooms.  I run upstairs to the doll room and quickly set up a foam board backrop and drape some white silky fabric over it.  The light coming in through the doors in the doll room at that time of day was perfect.  Here is the photo set up
Here are the resulting shots after photo editing.  This girl came to me with a considerable amount of flyaways so photoshoping was a MUST.  Even with that, I absolutely love this lady and this artist.  Can’t wait to own more of his work!!

Photoshoot Friday – Shopping for Props

Instead of spending this beautiful sunny day in the Pacific Northwest inside with my photo studio, I decided to go shopping for some photo shoot props.  My friend Jane and I set off to one of our favorite places to shop for unique things….Snohomish, WA.  If you have never been there, it is an adorable little town right on the banks of the Snohomish River.  It is known for its historic small town Americana feel and its unique boutiques and antique shops.   I have some favorite places I go in Snohomish where I usually find smaller scale items that work perfectly for my dioramas and photos.  I have two rules when shopping for props.  1) Right scale and 2) relatively inexpensive .  If I find something extraordinary….of course I might increase my budget a bit.  Today….I had to increase my budget a bit on one item because it was just too fun to pass up.  Here are photos of what I found.
The first photo shows a lovely jewelry box which is about 7 inches tall.  Pefect for a tall credenza in a diorama.  The little embossed urn will be in future photos – lovely background piece.  The little trees will work in many dioramas and photos.  Lastly, on  top, is the fantastic statue complete with fig leaf LOL!!  Must use this as a photo prop if it is the last thing I do. The bottom photo shows all the of the wall art I found.  Today was definitely a wall art day.  Sometimes you will find many things and other days  – nothing!  The nice thing about all of these pieces is that they are very thin and light so they are in scale when they are hung on a wall and they can be supported on a wall easily (ie with a pin or double sided tape).  I look forward to using these items soon and sharing the resulting photos.   Sorry, no photoshoot photos to share but something photoshoot related.

Loading the thread

I spent a great deal of time today loading pictures and answering posts on my BFC thread titled " Think_pink1265’s collection and playroom ".  I am always amazed at how generous people are with their compliments and time on that board.  I keep watching the numbers go up and up on my youtube videos and I am more pleased than I can say that people are enjoying the slideshow videos.  There are some amazing slideshows of collections on youtube and it makes me want to investigate slideshow software.  If anyone wants to see a cool slideshow check out http://www.youtube.com/watch?v=GxRWFb1Te1s&feature=related .
 
In the future I hope to add new photos on Fridays with a feature called " Photoshoot Friday’s "  I also want to show the process I go through to shoot, photoshop and post a photo.  There are so many questions about how to take better fashion doll photos and I would like to share what little I have learned. 

Evening of the Rubik’s cube

Today was spent organizing my house as the kiddos were off to their first "official" full day of school.  That was very productive.  This evening however, was spent doing something that in my mind should have taken a mere 30 minutes but of course took over an hour and a half.  And the worst part is I had to call in "technical support" – my husband LOL!  Not that I hate asking him for help just that he does programming all day and the last thing he should have to deal with when he gets home is….programming stuff.  Okay so the goal of the evening was to create and post a custom signature button on my account at the BFC board so that when I start my own thread there will be a button at the bottom of the page that will take people (if they want) to my blog.  Easy right??  WRONG!! 
 
The first step was to create a photo with text that was no bigger than 100 pixels high and 400 pixels wide.  I could not figure out how to resize the image then get the text large enough so it could be seen in photoshop elements.  I figured out (with technical support) that you have to resize the photo first then put the text in and it all works out.  I thought getting the image just right was the hard part and then you would just post like normal in my BFC account under "signature".  Not so!  I followed all the instructions.  I looked at other people’s signature lines to see what they did.  I again, followed all the instructions.  I got horribly frustrated because nothing was working.  I called in technical support.  That is usually the end of it as my "technical support" usually takes five seconds and fixes whatever black screen of death mess I have gotten into.  This time, he was programming it into the BFC signature box and NOTHING was working.  This is when the evening mood in the house takes a turn.  Now this program becomes the rubik’s cube of the world and must be solved or there will be no peace in the world.  I get to see what my ‘technical support" hubby must be like during the day.  He is typing in sanskrit and moving between screens so fast I can’t keep track.  Nothing is working ….the rubik’s cube is not getting solved and there will be no peace in the world/house tonight.  Then I say, maybe we need to log out and log back in for something to work….or maybe something has to process before changes are accepted??? I was basically grabbing at straws.  My "technical support" gives many good and valid reasons in programming speak why that should not make any difference.  He continues to try and solve the rubik’s cube.  I am getting ready to bag it entirely and begin to think I will never start my own thread on the BFC.  Frustration reigns with depression not far behind.  My darling technical support finally puts the frustrated emoticon in the signature box and he goes to test….nothing.  We try the last resort of logging out of my account and logging back in….SUCCESS!!  A few harsh words from technical support as to why it was totally ridiculous that we would need to log out then log back in.  I consider for a few moments if I want to keep the adorable "frustrated" emoticon as my signature.  It seems appropriate after this evenings drama…but no…technical support can smell victory and is working happily now to put the code he had in at the very beginning of this process.  We log out….say a prayer….and log back in.  "Oh sweet mystery of life at last I found you….." Okay so if you are a Young Frankenstein fan you get the reference.  All this so that I can have this
 
 at the bottom of my BFC posts.
 
Rubik’s cube solved…..peace is restored in the world.


Birth of a Doll Room

I am starting this Blog to hopefully share some of what I have done and inspire others in their doll collecting hobbies.  I know that I have been so inspired by what other collectors have shared so I wanted to “do my part” so to speak.  Let me first say that I am overwhelmed by the wonderful people I have met through this hobby and I continue to be amazed at how giving and wonderfully creative this group as a whole is.  I get inspiration every day from the photos of other collectors work (photography, dioramas, redressing and OOAK art).  Last year I embarked on a project that is the holy grail of many collectors.  I had the opportunity to plan out and have my own doll room constructed from a spare bedroom we have in our house.  I started with an standard 12 ‘ by 12’ bedroom.
Then the planning began…..what should I do, what should I do?????  I must have drawn up a thousand different plans and consulted every picture on Doll Rooms that I could find.  There were and are some phenominal examples on the Barbie Fan Club board ( BFC).  After researching I knew I wanted a number of things:
  1. Shelving for displaying dolls
  2. Larger shelving for diorama displays
  3. storage for clothing, boxed dolls, accessories and diorama items
  4. a table or work surface
  5. ability to make the room multifunctional –wall bed?
  6. lighting in the display cabinets
  7. easy access to electrical outlets on diorama display shelves
  8. large display area (2′ x 3′ and at least 18 inches tall) for Barbie Vintage Fashion Shop display
  9. Better overall lighting in the room – possible addition of chandelier or track lighting.

A very long list right.  So I decided to call a professional for help.  I worked with Pacific Wallbeds Northwest to design a system of shelving and wallbed that would meet the needs of the list above.  They were able to accomodate each and every one and made the process so enjoyable along the way.  They came in on budget and one time – a match made in heaven.  Their team even put in extra items that I had not thought of.   There is a large corner in the room when you come in the door and the designer with WBNW suggested a radius cabinet to maximize display space.  I had a couple of IKEA display cases that I wanted to use in the room and the designer suggested we set them up on cabinets so you could see the displays better and that offered storage underneath – brilliant!.  Here is how it turned out.