An Updo Hair Tutorial
Over a year ago, a very nice woman wrote to me and asked if I would share some tips on a certain hairstyle I had done. I was all enthused to do a hair tutorial and had every intention of posting the information. Well…of course…I never got around to posting it. My bad! While at the recent Fashion Royalty convention in Chicago, I met a very lovely woman from France and yes…you guessed it….she was the one who had originally asked for information on how to do a certain hairstyle. Now, having met this person face to face and having promised to post a tutorial, I hereby dispatch my duty LOL!
And for the lovely Rebecca V. from Paris, this one is for you . Merci beaucoup pour votre patience en attendant que cette information.
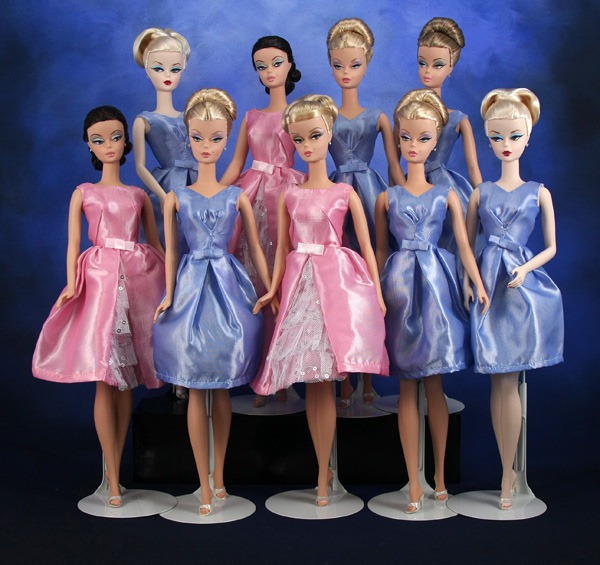
Here is a photo of the restyled table dolls I gave at the last Barbie Convention:
*** A word of caution about this tutorial. Once I do the dolls hair in an updo, it is not coming down. It is a permanent hairstyle change. If you are looking for temporary hairstyle changes, this is not the tutorial for you. ** Also…it is highly recommended to practice on a less expensive vinyl doll first. I practiced on some older playline dolls of my daughters before I tackled the Silkstones.
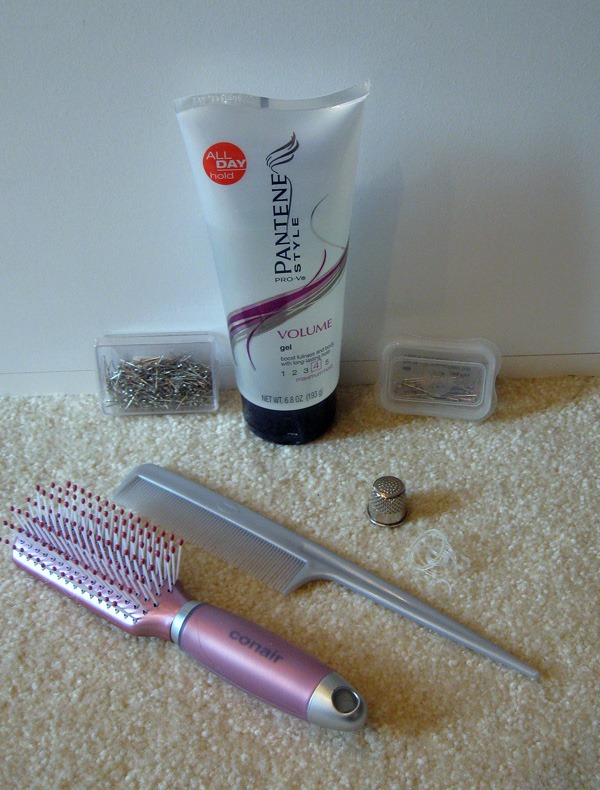
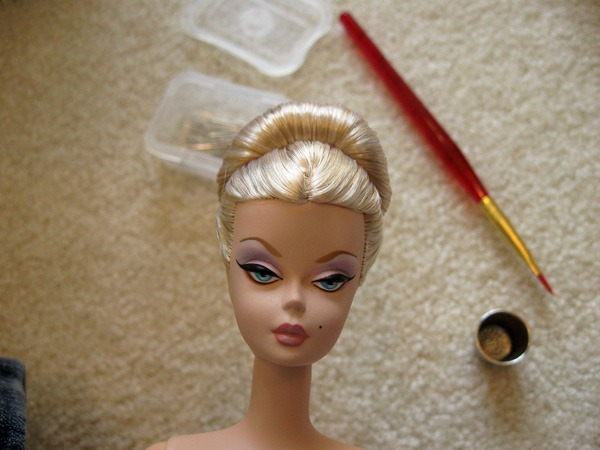
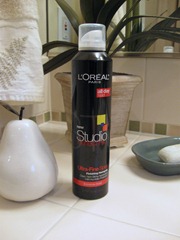
I use the following products when I restyle doll hair:
1. Firm Hold Hair Gel
2. brush and rat tail comb
3. Straight pins ( nickel plated…so far no reaction with Silkstone vinyl)
4. Small clear rubber bands
5. A thimble
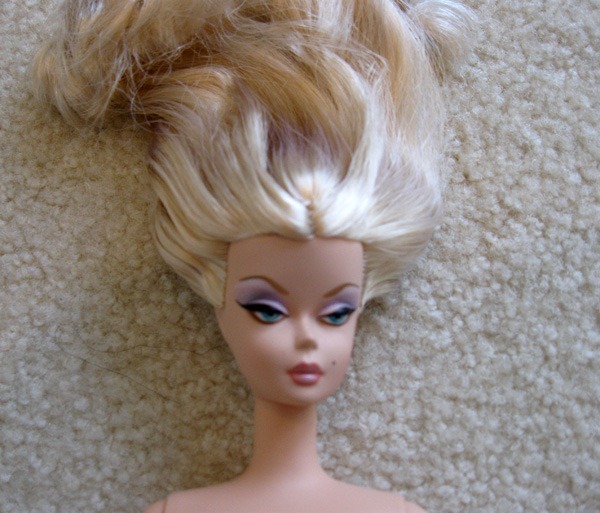
First, I liberally apply the gel to the section of hair that I will be styling and rubber band it at the top/back of head.
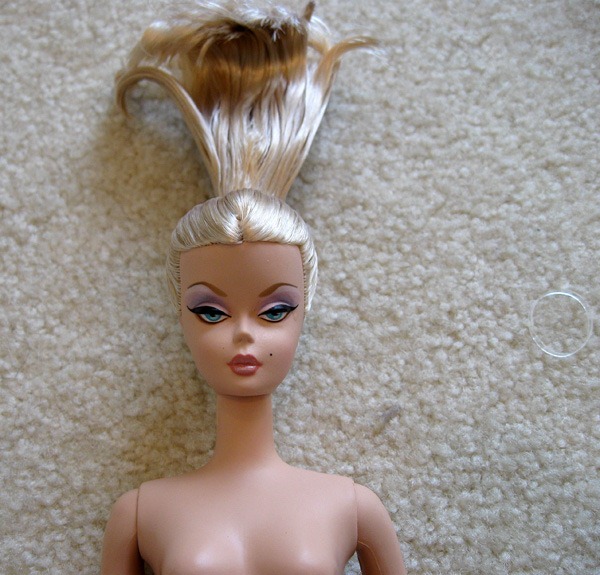
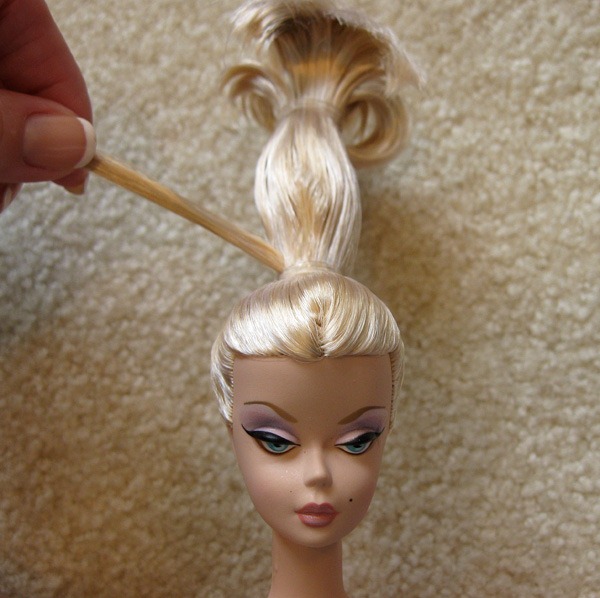
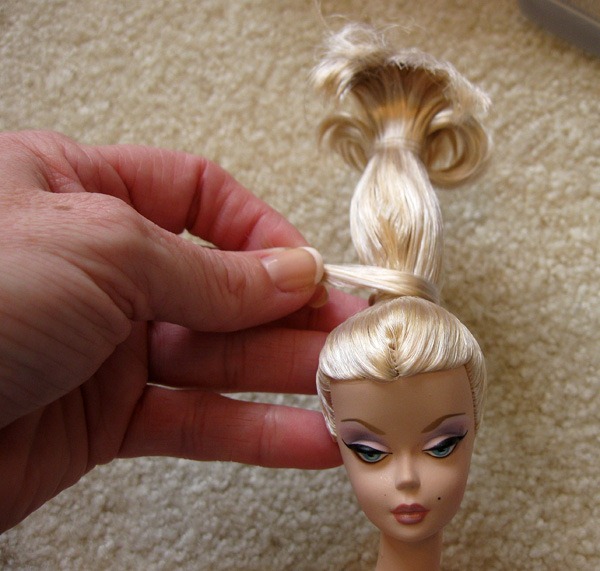
Then I put a rubber band about an inch and 1/2 down from the other rubber band and leave a small section out from the right side of the hair bundle. This will be used to cover up the rubber band …you will see what I mean.
Next, I pull the section of hair around the rubber band…..
The gel will help keep it in place for a bit but I try to hold it there while I work on the rest.
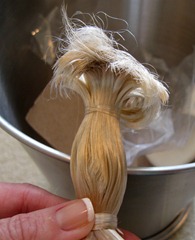
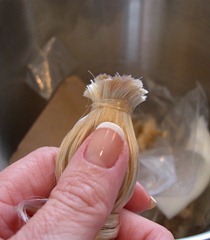
The next step is the one that normally bothers people…yes…I cut the hair. Please avert your eyes if you can’t handle it.
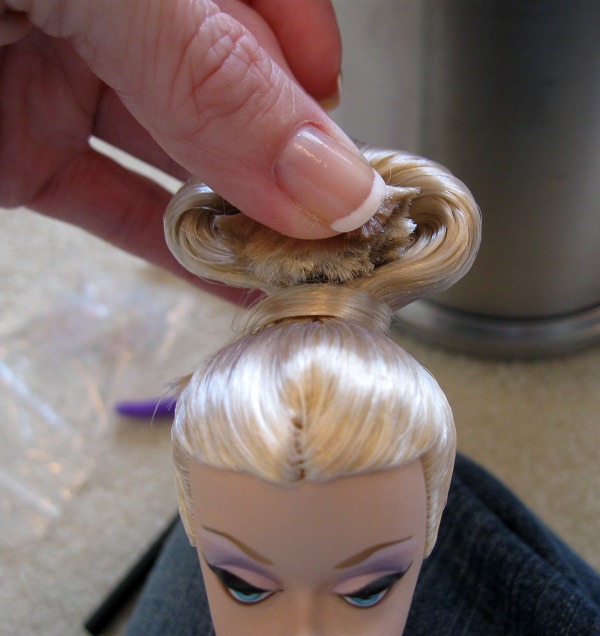
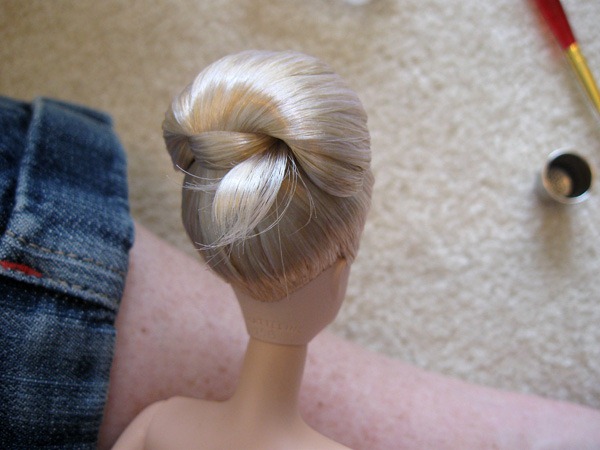
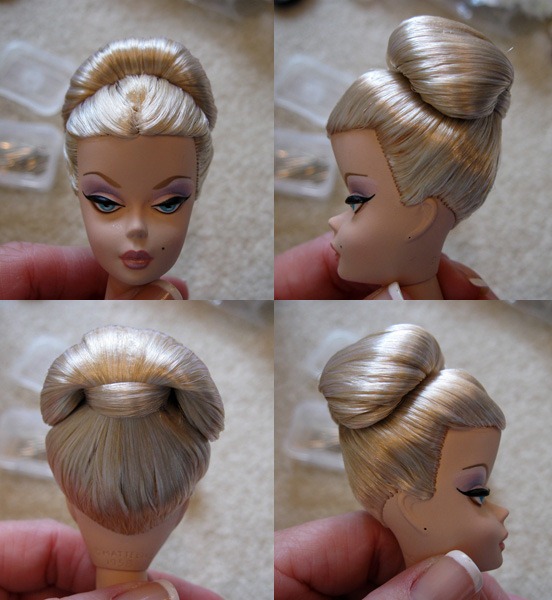
Once the hair is cut, I fold it forward towards the face. Notice that piece of hair that I left out of the bundle is wound around the bottom rubber band and hanging off to the right side of the dolls head.
Fold the hair forward, concealing the ends of the hair under the bundle.
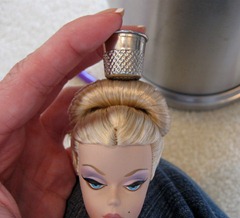
Hold firmly and insert pin on top of hair bundle. I use a thimble to push the pin down into the head.
I usually use 3-5 straight pins for this updo but you may need more or less depending on the doll and the amount of hair. I put one in the middle and one a little bit to the left and right. Keep in mind that if you are working on a Silkstone head, you will need to use a fair bit of force to get that pin in her head. I highly recommend a thimble if working with Silkstones.
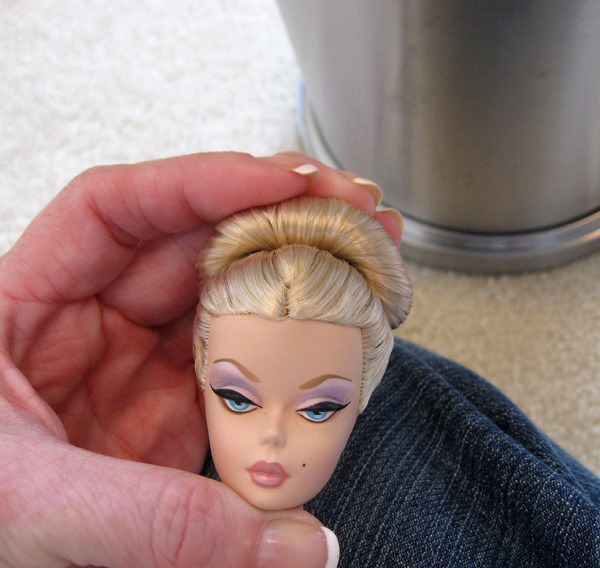
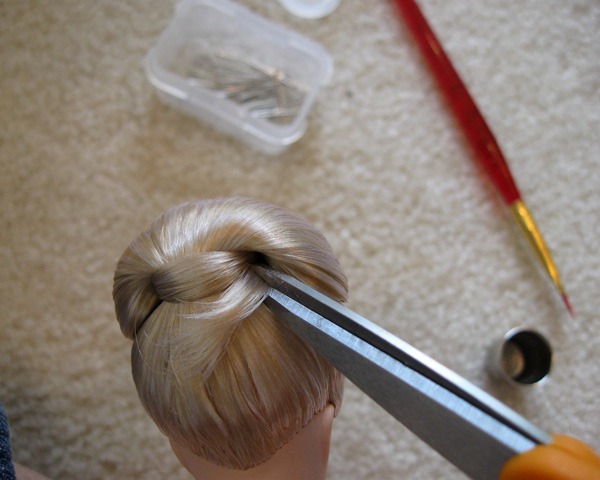
Once you have put in enough pins and the hair is staying up on it’s own without you holding it, you can take care of the section of hair that should still be hanging out the back from where you covered the rubber band.
I use very sharp small sewing scissors for this .
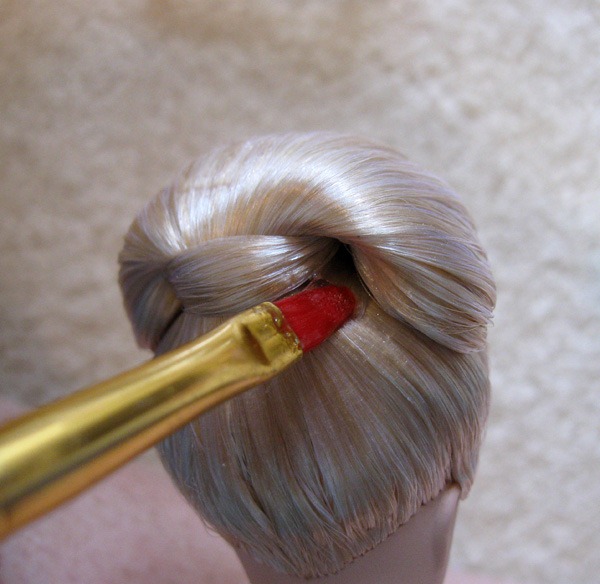
Then I fix the end of the cut hair with a dab of hair gel to “glue” it in place.
Et Voilà!
I usually spend a few minutes snipping stray hairs and smoothing bumpy hair with the hair gel if needed.
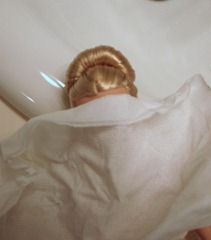
I typically finish the hairstyle with a very fine mist hairspray. Make sure you protect the dolls face when you spray as some sprays can affect the face paint or finish.
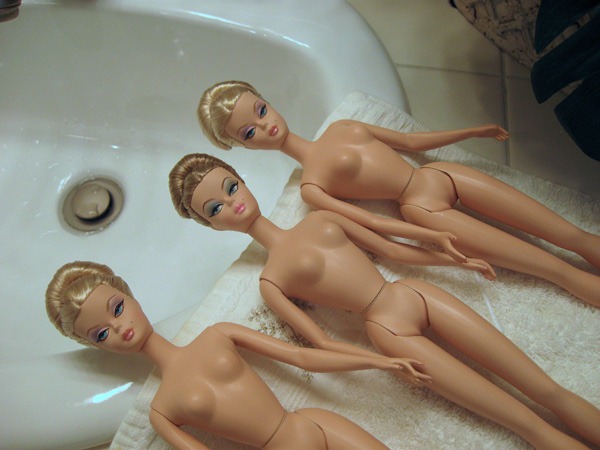
Here are some of the ladies hanging out while they dry after I sprayed them.
Hope this helps explain it! If there are any questions, feel free to contact me…otherwise, have fun styling those ladies.
This entry was posted on October 21, 2011 by raberry65. It was filed under Barbie, How to, Silkstone and was tagged with Barbie updo tutorial, doll hair tips, doll hair tutorial, doll tutorial, restyling Barbie hair, Silkstone Barbie.


Rebecca, you RULE!
I love this hairstyle and I am going to give it to some of my Poppys. Thank you for sharing your technique in this awesome tutorial.
xo H
October 21, 2011 at 12:05 pm
Heeehee! I LOVE the sound of “you RULE” now….can you teach it to my kids?! Now you can have a visual reference for the quick tutorial I did in Chicago. I have been meaning to do this tutorial for quite a while. It feels so good to finally do it.
October 21, 2011 at 12:20 pm
Beautiful! You are so multi talented! Which Silkie did you use with the lovely light violet eye shadow, she’s got such beautiful make up!!!
October 21, 2011 at 12:14 pm
Hey Laura! You are too sweet. Thank you very much. Believe it or not, this is the Tout de suite Silkstone. when you pull the hair away from her face, she has the most beautiful face paint.
October 21, 2011 at 12:18 pm
Is the silkie with the ash brown hair Market Day? She also has unexpected gorgeous face paint when her hair is up.
xo H
October 21, 2011 at 12:42 pm
Yep! That’s Ms. Market Day. Doesn’t she look fab with the updo?!
October 21, 2011 at 1:22 pm
Ty so much for this.
I tried it before and mine always came out messy lol
I see all the needed steps you provided to make this a polished style.
Your a whiz and that is why I always enjoy your posts 🙂
October 21, 2011 at 1:39 pm
Thank you so much for the lovely comment Kelly! I am glad you liked the tutorial and the blog. I hope to do more tutorials in the future.
October 22, 2011 at 8:45 am
Dear Rebecca,
thank you so much for sharing your secrets with me (us actually). It was a real pleasure meeting you. I’ll give some of my dolls a try this week end and will let you know how it worked.
xo
Rebecca V.
October 21, 2011 at 2:48 pm
Bonjour Rebecca! It was a pleasure meeting you as well. Please share pictures of your dolls and their new hairstyles when you have a chance. Would love to see them!
October 22, 2011 at 8:46 am
Thank you for the tutorial, I have done this hairstyle rolling the hair under for a lower bun, but now I need to try it rolling the hair up. I got my Grace dolls in the mail last week, they are lovely!
October 21, 2011 at 3:05 pm
You are most welcome! I started out with rolling the hair under as well and love that look also. This is just another kind of look. Oh so happy to hear you received your Grace’s and that you like them. Can’t wait for the release of “Rear Window” Grace. 😉
October 22, 2011 at 8:48 am
very cool – I am excited to try this!!!!!!!!!!!!!!!!!!!!!!!!!
October 21, 2011 at 7:42 pm
You will be shocked at how easy it is Peter. That’s why I wanted to do the tutorial. It’s such a lovely hairstyle and sooo doable. Share some photos if you try it.
October 22, 2011 at 8:49 am
Thank you so much for share 🙂
October 21, 2011 at 9:43 pm
You are very welcome!
October 22, 2011 at 8:50 am
AWESOME tutorial. Thanks for sharing!!!
October 22, 2011 at 5:51 am
Thank you and you are most welcome Audrey! Now, like Hilda, you have a visual to go with the quick demo I did at F.R. convention.
October 22, 2011 at 8:51 am
Fantastic! I immediately went and tried this out on a playline barbie with excellent results.
I love updo’s, this tutorial was just what I needed. Thank you!
October 22, 2011 at 8:36 am
Who knew it was this easy?? I am so gonna try this as I’m in a “play with my Barbie’s” mood today. 🙂
October 22, 2011 at 1:55 pm
Fantastic! That is what the tutorial was supposed to inspire….more Barbie play time! Hope it turned out okay for you.
October 23, 2011 at 2:43 pm
Beautiful job Rebecca. Thanks for sharing. I will have to try it soon. Do you have anymore styling tips?
October 23, 2011 at 7:31 am
Hi DiAnn,
I have a couple more ideas on tutorials so will have to give it some thought and see what I can do. As far as styling tips, I think I am just winging it most of the time LOL! I uses some products fairly frequently when I style a doll for a photo shoot and perhaps that would be another great tutorial at some point. If there is something in particular you have questions about, please feel free to email me. I LOVE questions. 😉
October 23, 2011 at 2:47 pm
I look forward to more hair styles. I am pretty crafty but I kinda suck at hair so I need all the help I can get.
DiAnn
October 23, 2011 at 3:53 pm
Job well done!!! I am a up do hair diva … I may share some of my tricks with you!
October 23, 2011 at 8:47 pm
exlicacion fantastic! I love your page!
November 3, 2011 at 4:47 pm
Thank you so much for sharing this info. You make it look so easy and the updo looks great!
November 10, 2011 at 8:27 am
You are very welcome Marion. The point was to make it fun and easy so I am glad that came through.
November 10, 2011 at 12:31 pm
Rebecca which silkstone is that model?
November 10, 2011 at 11:52 am
Hi DiAnn! I used Tout de Suite Silkstone for my hair model. She looks totally different with her hair pulled back now doesn’t she?
November 10, 2011 at 12:32 pm
Very different but lovely
November 10, 2011 at 12:48 pm
Oh please tell me that you are going to do MORE of these instructions on hair….I LOVE THEM!!!! Thank you for sharing this with us, I did try it on an old barbie and it worked!!! Waiting on pins and needles for more….LOL THANKS
November 22, 2011 at 6:47 pm
Thank you so much! I am glad you liked the tutorial and you found it useful. I will see what my schedule will allow as far as more tutuorials. 😉
December 18, 2011 at 9:58 pm
THANK YOU SO MUCH, Rebecca. OMG, ever since I viewed your remake of ‘Verushka’, I’ve been waiting for some type of instruction of this redo into an updo. AWESUMMMM… I am truly a fan of yours even at ‘Etsy’, Youtube, here, I’m going where you lead, Oh Doll Lord. Silkies are a few of my favorite things and the way you market them. No one does it better, please keep it up. I am just smitten by your work, and your pix, you must do a pix for me. You are the ‘swammy’.
December 1, 2011 at 12:00 pm
Thank you so much for the lovely comment! I am glad you are enjoying my work and finding the tutorial useful. I hope to do more slideshows in the next year. Have been working on real people photos,videos and slideshows for the past few months so now it’s time to play again. 😉
December 18, 2011 at 10:01 pm
lovely hairdo!!!
January 11, 2012 at 5:45 am
Thank you!
February 4, 2012 at 11:33 am
This is fantastic, thank you!
I’m writing a cycle about rerooting for my Polish readers, would it be ok with you if I include this link in the next instalment?
February 4, 2012 at 10:52 am
Thank you for asking! Yes, you may use the link to my blog tutorial in your article. I am glad you enjoyed the tutorial.
February 4, 2012 at 11:34 am
This is just wonderful. Would you still use a ponytail but a side one if you wanted to do a chignon? it it is similar to bun but you tuck the hair in down the back of the head! you can also have one at the base of the neck? Would love to know.
April 25, 2012 at 5:12 pm
Hi Melanie. Glad you enjoyed the tutorial. I have done roughly the same thing with others just lower ponytail and tucked the hair down instead of up and it works in much the same way. Here is a photo of that style http://www.flickr.com/photos/42498300@N07/4035482319/in/set-72157623521603942
April 29, 2012 at 3:41 pm
Thank you so much for sharing this tutorial. I hope this will work with any ordinary Barbie, a client brought me one of her daughter’s gently played with dolls to use in a cake. She is a hot mess and I wanted to polish her up for the big occasion. This looks like it will transform her! Thanks again.
April 26, 2012 at 3:48 pm
It should work with any Barbie..in fact you will find it a whole lot easier on regular vinyl Barbies versus Silsktones as teh vinyl will be much easier to get the pin through. Good luck on the cake! Sounds like a fun project and lucky girl to get a cake with a Barbie in the middle. 😉
April 29, 2012 at 3:38 pm
Tanks for this tutorial =)
January 16, 2013 at 3:06 pm
Give me your permission to share with friends, please? Thanks and I hope your permission =)
January 16, 2013 at 3:10 pm
Thank you Mony. Yes, you can share the link to this blog post with friends.
January 16, 2013 at 3:22 pm
That was lovely. thank you : )
January 23, 2013 at 6:13 am
You are very welcome. 🙂
January 28, 2013 at 1:23 pm
I tried this style on a generic doll – I think she was a flight attendant for one of the airlines. She has no hair in the middle and it’s a little thin but I am very happy with the results! The bun is a little high and big but for the first try – she looks like a completely different doll. She want to an “ick” doll to a “good” doll. I didn’t have hair gel so I used craft glue and it worked! Thanks for a great tutorial.
February 26, 2013 at 12:31 pm
Glad it worked out for you! 🙂
February 28, 2013 at 8:04 pm
The hair on the sides of the bun don’t lay flat like it shows in your picture. I understand about using pins to hold the center rubber band down but how do you hold the sides down so that they are close to the head?
February 28, 2013 at 7:58 pm
I use smaller pins ( like applique pins or silk pins) on the sides if the hair is sticking. Just thread it through so it anchors the hair and push in using the thimble.
February 28, 2013 at 8:06 pm
Wow Awesome!!! Love that hairstyle!
April 26, 2013 at 4:34 pm
Glad you enjoyed! 🙂
April 26, 2013 at 7:29 pm
Thank you so much for the hairstyle idea. I just bought the Red Carpet Outfit and I was not happy with Barbie’s hairdo. It was not red carpet worthy. She now looks amazing…
May 15, 2013 at 11:29 am
Pingback: Anja and I had it out Hunt-ty! |
Gracias por el tutorial,lo voy hacer, si hay mas tutoriales me gustaría aprenderlo.
July 16, 2015 at 2:13 am
Loved the tutorial! I never thought about permanent hair styles, but now I’m seriously considering it. However, if I had tried that when I first started selling Barbie gowns, and needed models for the dresses, I wouldn’t have come up with the idea of making my own Barbie sized hair pins (Not Bobby Pins). I started selling them 4 years ago on my Etsy shop and they became my best seller. I have recently started my own website (grammalily.com) and I’m trying to reach out to people who might have a use for them. If you think you would be interested, I’d love to send you a free sample so you could try them out. If you like them, I’d be happy to supply as many as you need, in exchange for your recommendation of the pins and my site. They come in 2 colors and 3 sizes. I’d also appreciate it if you could take a look at my site and let me know what you think about my other products. As you might be able to tell, I’m kind of new at this, and in you I think I’ve found someone with the experience that can help me out.
Thank you, in advance,
Lillian Malburg, akd Gramma Lily
July 26, 2015 at 6:37 am
Very Niceeee!!! 👍
February 20, 2017 at 6:29 am
Although your style is elegant and chic. Not quite brave enough to to cut hair properly. Have tried in the past to disastrous results!.
Do you have any styles less radical?
June 9, 2017 at 4:22 am
Hi Anne. Yes, cutting the hair is a scary thing LOL! At this time, this is the only hairstyle that I have a tutorial on.
June 19, 2017 at 10:51 am
How about sharing some other hair dos?
July 13, 2020 at 8:53 am
That style is the only one I have in my repertoire for now. There are OOAK artists more talented than I at hairstyling that share their tips and tricks on Youtube, blogs and Instagram. 🙂
July 13, 2020 at 9:11 am
You ROCK!! I just found this today. Have to other “how to…” Barbie hairstyles?
November 9, 2020 at 7:41 pm
I am glad you like this Mandy!! Sadly this is the only hairstyle I have done for now. 🙂
November 10, 2020 at 4:20 pm
I am so glad I found this! I used to use this tutorial all of the time on dolls and wanted to try it again for some newer dolls! I hope to see more of your hair tutorials in the future!
July 31, 2022 at 6:58 pm